Sunday, December 8, 2013

Laying a stone tile floor, part 3

Finally, the stone goes down: 

Next is to seal the travertine and grout the tiles. Almost done!

Side note: we somehow crashed a drill during mixing. I suspect a faulty piece of equipment but it looks like a short along the armature of the drill motor: 


Replacement or repair cost as much as the drill, so we replaced it and gave the new one back to the neighbors who loaned it to us (Doh!)


Laying a stone tile floor, part 2

The previous threshold was pretty rotten so it had to go. 

So the new one was placed with significant silicone caulking to seal it up. 

A little damage to the casing from prying out the rotten portion but will have to be fixed up when it is a little warmer. 
Te cement board:

Thursday, November 28, 2013

Laying a stone tile floor, part 1

While I know this isn't woodworking per se, I did write a post once about how those skills have helped translate into other projects, so this is a callback to that sentiment. Anyways, we decided to redo the "sunroom" floor after the dog finished off the old carpet that was in there (in fairness, he really just put it out of its misery.) and it was decided that we would be laying travertine. So we ripped the carpets out and pulled up all te carpet tacking. I checked to make sure te floor was level (it was) and flat (it mostly was) and we are now dry-fitting the cement board underlayment. Now, I read many various posts about skipping the thinset mortar under the backer boards, and ultimately the final word is "don't be lazy, fool!" which is what the manufacturer says to do, too. (Hardieboard). Additionally , I'm hoping the additional layer on thinset will help offset the extremely slight crowning at the middle of the room and allow a more flat surface when screwed down. We shall see...

Friday, November 15, 2013

Small Rack

Small rack to hold dog leashes in the laundry room. This is a piece of aspen that really fished well. The dowel posts are poplar. Stain is "gunstock". 

I chamfered the edges and used a Forstner bit on the drill press with the board propped on a similar thickness board beneath it for the angle. Top coat of de-waxed shellac.  I really had no idea aspen had such a nice grain to it. 

Thursday, June 20, 2013

Keyed mortise and tenon 2


After a few mistakes here and there, the keyed mortise and tenon coffee table is nearing a final state.  A few notes: maple is hard to work with, but the keyed tenon is solid as a rock as a result.  So that is nice.  I might still cut new keys as these are still a little too "angular" and they are slightly too long/high.  

I am very pleased with the table top, it will be the first project that was really properly surfaced prior to finishing.  The lamination turned out very nice as well, and the sanding makes such an immense difference in the finish of the final piece.  I think once the keys are fixed up and the top secured, we will be happy.  This was an additional test-piece prior to working on the cherry bench that was the inspiration for this piece.

Thursday, June 13, 2013

Adirondack Chair

So this was my most recent project. It is interesting because this was the absolute first thing I started when I didn't know anything at all, then I took a big long break from it. Then, I came back to it after doing other projects with more skill (and more tools). Full disclosure: I used a jigsaw and sander. Now that I can go outside it is a little easier to do those things. 
Now I need to make a few more or it will be a pretty lonely seat :) it is comfortable which is nice and I think it is aesthetically pleasing as well. It is cedar with teak oil finish.

Friday, May 31, 2013

Hard Maple - they aren't kidding

Prior to making the cherry bench, I wanted to make a slightly less serious project. We need a coffee table and I like the look of the Stickley "fireside bench", so this is loosely based on that design. 

This is my first project in maple, and for the record, hard maple really earns the title of "hard". What a difference from working with poplar and pine. I think I already need to re sharpen pretty much everything I've used on it so far. 

The first photo is of the initial laminating of the top.  While I am improving in my larger lamination skills, the required trying and truing took hours of hand planing to get reasonably flat.  I don't have a true scrub plane, but I now fully understand the utility of one.  I also picked up a nice long Stanley #7 which helped immensely for the longer runs.


This is the top of the bench withe some initial dry fitting and measurements for making the keyed tenons.  I realized after fitting that I did not do a shouldered tenon, which was a mistake.  I decided to place reinforcement blocks underneath to bolster it instead of cutting a new piece; I may change my mind before final assembly.


Sunday, March 10, 2013

Keyed mortise and tenon

The next project has keyed mortise and tenons, but before I ruin perfectly nice cherry pieces, I thought i should work out a few kinks. Here are the first few attempts. I'm trying to get a very slight 5 degree angle to the entry point, as the receiving mortise is a panel type leg for a bench, and has a slight tilt. I have already learned if you over tighten the key you will take a beautiful chunk out of the remaining mortise... So gentle taps only!


Friday, March 1, 2013

Poplar TV stand: 6 - Completed


Stained with Minwax "Red Mahogany", and Minwax Paste Wax.  We were going for a rustic, slightly "worn" look, which works well with my rustic, novice joinery.  The finish came out nicely.  We had read before that the poplar would take up the stain in a "blotchy" fashion, we did not use pre-finish, though we thought about it.  Looking back, it might have evened out the color, but it works nicely.  


The top being smooth-planed to reduce sanding.  We left a lot of the rough plane marks to enhance the desired appearance.   I had not accounted for the visibility of the wire-mess that emanates from my TV, so I might be adding some hideaway features shortly to hide the cables underneath.

Saturday, February 23, 2013

Poplar TV Stand: 5

The bottom shelf is done. Somehow I had a bit of an issue with fitting one corner. Lesson here I think is decide on the shelf design first and dry fit instead if trying to wedge it in and size it as you go. At least I learned a little repair work as a bonus. Next: attach top, sand, stain!


Small repair in the back corner, which ended up being the front.  It fit nicely.

Saturday, February 16, 2013

Gramercy Tools Holdfasts

I had seen a holdfast used many a time on The Woodwright's Shop and elsewhere, and finally saw a reasonably priced option available from Gramercy Tools. They work as advertised, and I am pleased. It is actually quite amazing how often I find myself reaching for one. As a bonus, my bench seems much more "legit" with dog holes in it ;)
We shall see where this takes us now...

Poplar TV Stand: 4

Laminating the top. Next will be the bottom shelf. I found that just gluing two at a time was far easier though I was initially tempted to try all three at once. I'm glad a went with the former.


Poplar TV Stand: 3

The frame is coming together nicely. I got a crazy idea to test my joinery skills and try a sort of dovetail style joint for the cross piece of the bottom shelf. I'm pleased to report it worked out quite nicely and provided a nice tight fit.


Tuesday, February 12, 2013

Roubo book stand: poplar

While in the middle of the TV stand project, I got the itch to do one of these book stands. I had a very dark leftover piece of poplar from the TV stand, and thought this would make a nice stand. So I eyeballed the dimensions and made an odd number of hinge points... I am wondering if I have a panel saw up to the task of the final splitting...


Sunday, February 10, 2013

Stanley #358 mitre saw: my new chop-saw

I had driven by this a number of times in an antique shop window and finally went in to check it out. Since I am still early on in my learning woodworking I didn't really have an appreciation for some of these tools. I had seen this tool on The Woodwright's Shop. After having to make a series of cuts using a cheap plastic (and overly flexible) mitre box, I realize the incredible utility of this saw. It was well taken care of and I have had to do little other than lubricate it and it does the job well. I may contact an author of a post on his restore regarding the oft missing piece that controls the length of pieces

Poplar TV Stand: 2

The frame is coming together. I must confess that I tried out the technique of boring out the mortise holes with a drill before cleaning up with a chisel instead of chopping them entirely, just to compare. I would say, like most of these things, the drill method requires less skill overall which is nice since I am over my head with this project in terms of skills required.
My final tenons were nearly perfect as I finally figured out the correct/best way to pare them down to the lines. I'm now hoping glue will help my slightly loose tenons...


Monday, February 4, 2013

Poplar TV Stand: 1

Our TV stand was broken recently so this became the next immediate project. A little frightening since it is probably above my skill level at this point, but challenge is good.
We were going to go for maple but opted for poplar since again, I'm going to ruin a few pieces before it is done.
The legs were laminated and came together quite nicely. With trepidation I chopped mortises into them. So far so good. My tenons, on the other hand, was where I learned some new skills. I now fully understand the idea of "sneaking up" on the proper for. By keeping things just a little oversized, the trimmed fit to the mortise is now super tight.


Tuesday, January 29, 2013

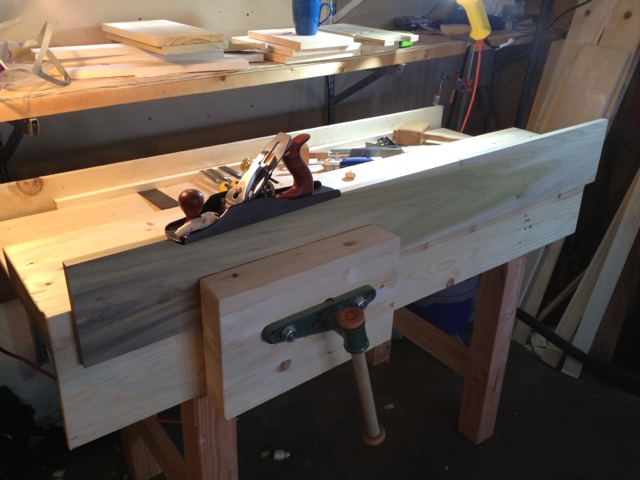
Workbench completed!

Finally complete, and already in use. It happens that our current TV stand which is a nice Stickley piece was broken. So, we decided to make a new tv stand. This may be a little more advanced than I am ready for but it is in need! So project one is already under way...
As far as the workbench, mounting the vice wasn't too bad but I suggest cutting holes much larger than you expect. Also, the first vice plate was too thin so now it is a laminated section (leftover from benchtop!) and much stronger with a bonus 3.5" benchtop space. So, more details to follow re: project TV stand


Saturday, January 19, 2013

Workbench Construction pt. 2

More progress, more lessons learned, including backing the wood you are driving a chisel into (so you don't go through the other side... for the second time), and as always, careful measurement and accuracy are rewarded later.  Bench now needs to have assembly completed, front vise attached, and then further planed flat. Getting close!  This is from Paul Sellers book (and now videos) and it is absolutely ROCK solid.  It doesn't move AT ALL in any direction.  I did thinner skirts than the plan (another lesson learned... don't do as I did, do as he says!) but compared to some of the pre-made benches I have played with at some of the stores, this really does not budge, wiggle, or rock at all...


I want to reiterate that I am a beginner, and this is absolutely my first real woodworking project.  As frustrated as I was at points, I highly recommend the approach of building a bench first because I have learned so many things about various fundamental techniques from layout to glue-up, basic planing and even measurement.  Before I approach a new "finer" project, my basic skills will at least be off to a good start.  I could imagine I would have cheated myself out of some of those basics by skipping to a pre-made bench and jumping right into the finer work projects.  I will likely finish the legs and skirts but at -13 F outside, I think it will need to warm up before I can realistically apply the finish in my garage...

Sunday, January 13, 2013

Beeswax and Olive Oil wood finish

I found this being used on the number of websites for children's toys. It looked to be a pretty simple and straightforward recipe to try. Although I think it will require a fair amount of maintenance, I do think that it should be a good finish. I'm going to start out with this on the front-vise handle.  I am making it out of a poplar dowel with pre-made "toy wheels" for the ends.  I wish I would've taken in adequate pre-photo of these ends before applying the beeswax/oil finish, it really dramatically changed the appearance.


It really darkened up and brought out the grain. So, for now we will see how this does for just some basic sealing of the wood on the handle and a few other parts. The benchtop will likely remain unfinished. Hopefully, the bench will be finished this week...

Bonus Skills: Fundamentals are useful for new projects

I am by no means skilled at cabinets or carpentry, but having a little basic knowledge can go a long way. Our cabinet hinge broke and interestingly you can see that the bottom screw was in a knot. So basically the knot cracked out and took the hinge with it. Having started with this new hobby and reading as much as I could, this provided me with more options for fixing it such as moving the hinge. While some of you may find this sort of obvious, I was excited to try it instead of the various ideas of cutting away a small cube and gluing and re-mounting in the same place. And as a bonus, I had a reason to buy a Forstner bit.


This was done by hand without a drill press (but using a cordless drill, I don't have a brace yet) and though I read some people's concerns about using a Forstner bit >1" by hand, I would say with a 2 speed drill on low, it was no problem. I started with a practice run on pine to see how it handled. No skating, went right where I wanted. I would argue that the oak was a little more forgiving because it goes so slowly in the harder wood.

 Now, I am compulsive so I pre sharpened the bit because it seems that all new tools really aren't ready for use out of the box :) so maybe that made it easier. Staying vertical wasn't really a problem and the depth comes so slowly that you can stop and check to make sure. It may have helped that it was 9 F outside and the garage was pretty cold, so keeping the bit from getting hot was pretty easy (unfinished workbench underneath)


A few adjustments and we have a nice equal hang.  These "Euro hinges" are easy to adjust, to quote someone else I saw on woodworking forum, "you almost can't screw it up"